Beefsteak Tomato Drake
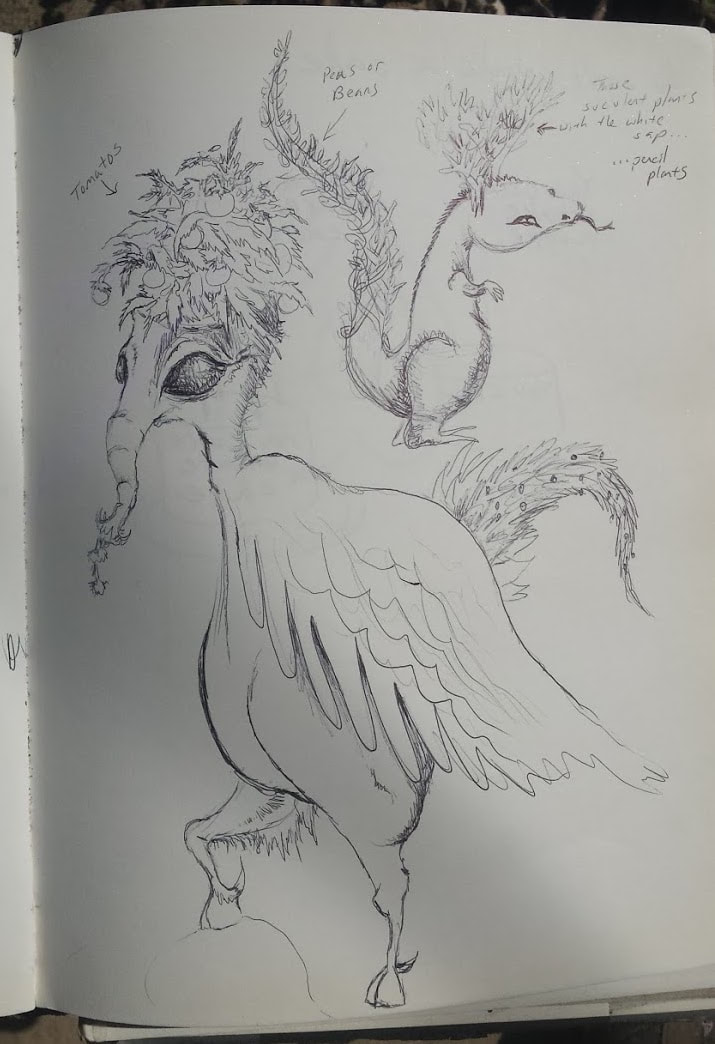
I became interested in creating some life sized fantasy creatures for my huge garden. I made some sketches.

|

|
|
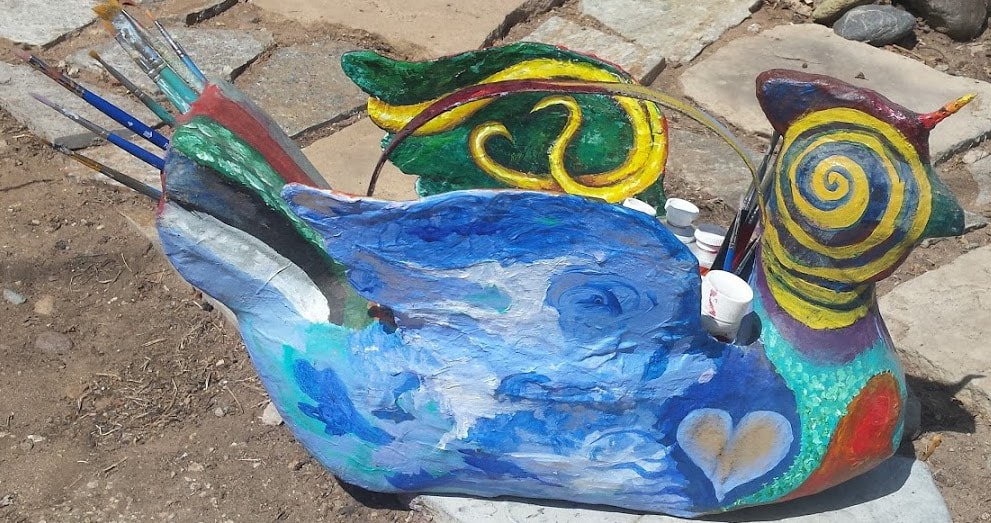
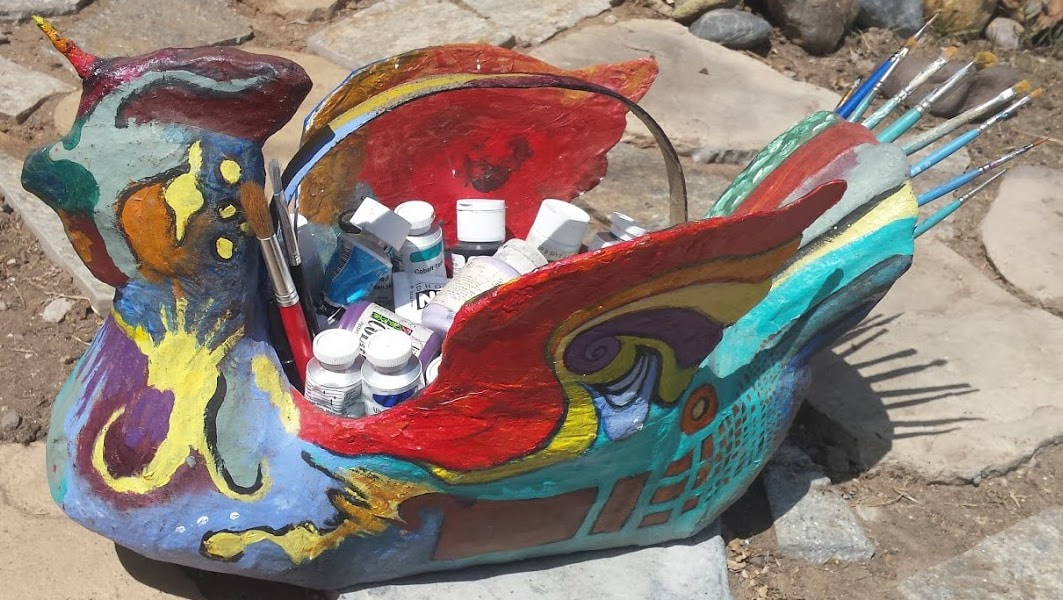
My good friend Nancy gave me a paper mache chicken basket to collect eggs from our hens, but instead I added wings and a horn and painted it up and am using it for my painting supplies.
|
|
I started playing with the idea of filling the chicken with dirt and growing plants out of it. Maybe I could design my creatures like this, with plants growing out of them as part of the sculpture! It would extend on my Urban Succession work! I made some designs...

|
|

|
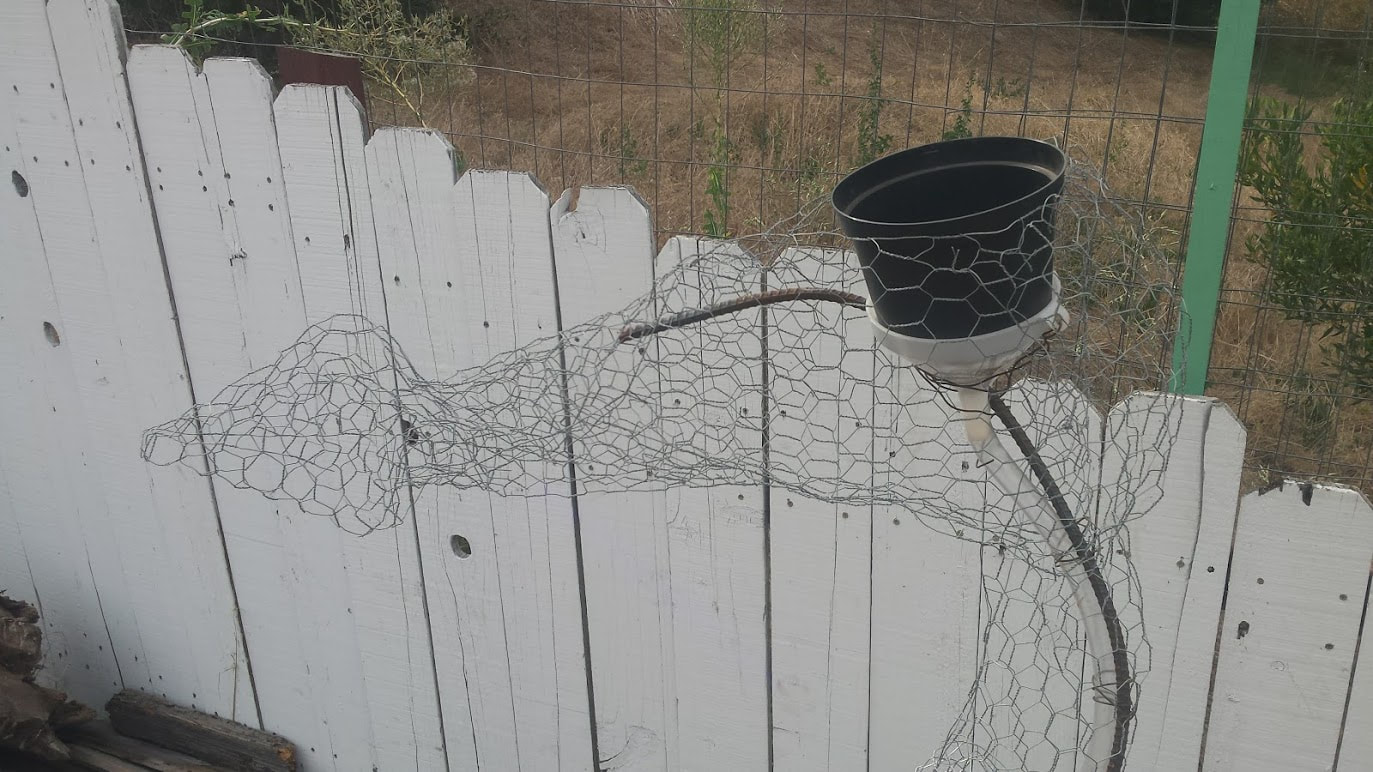
I finally decided to try and make a dragon of sorts. I'd call it a Beefsteak Tomato Drake. The whole project is super experimental. I have NO IDEA what I'm doing. The whole thing may fall apart at any point. SUPER FUN! I'll save my process here so I can learn and improve on my next sculpture. Here's a sketch that shows that its head will have a pot of live aloe vera as horns. I've glued a funnel under it with a hose that will transport the water down the neck to the body where tomatoes will grow.
|
Here are some initial sketches... |

|
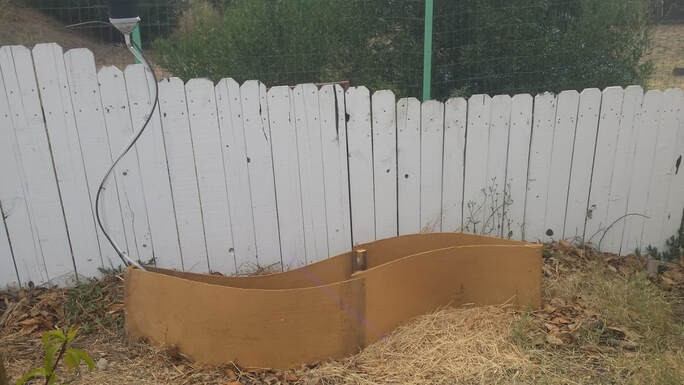
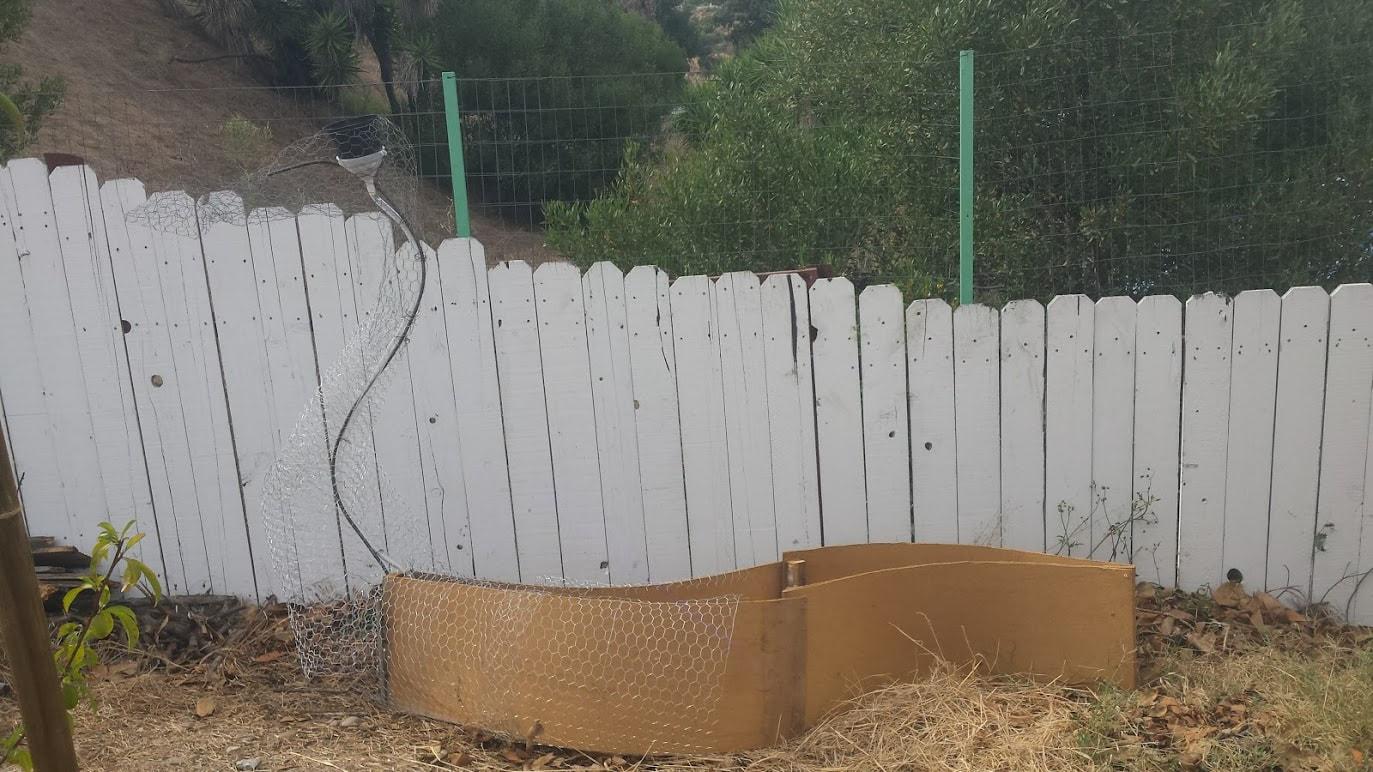
I found an unused area on the edge of my garden to be its home. I wet and bent some wood overnight. I grabbed some rebar and bent that for a neck. I constructed a wooden armature for the body, then staked it deeply into the ground with rebar. I bolted the rebar neck onto the wood body and wired on the aloe vera pot with its funnel & hose.
|
Next, I filled out the exterior with chicken wire.
|

Once that was on, I slapped a coat of plaster paper on it. That stuff is kind of expensive, and may melt away over the years. I ran out of it and started dipping paper towels into a tub of watery plaster...this worked well enough. Next time, I will use cheesecloth dipped in a tub of watery thin-set. This will be cheaper, stronger and bind with my cement coat better.
|

|

|
Next, I added three layers of cement. I used VersaBond, which is super sticky and easy to sculpt with. I also couldn't resist planting some aloe vera in its head.

|
I get up very early each morning, so I can work before the sun gets too hot. This morning was fantastic as I added on some glass eyes and started adding sculptural details to the head and neck.

After, just a few weeks, the eye faded into a sad grey, as it was just a paper sticker on the back of the glass...so I found huge glass beads and painted the backs with excellent lightfast exterior paints to create new eyes. I think mine look better anyways.
I added some details onto the head and body, as well as legs and clawed feet. I think I'm ready to paint it. This should seal the cement, as cement normally absorbs water. Also, it will give me a chance to play with colors!
Next, I laid a coat of primer over the whole body to seal the cement, then filled the body with good soil, and planted a row of Beefsteak Tomato Plants.

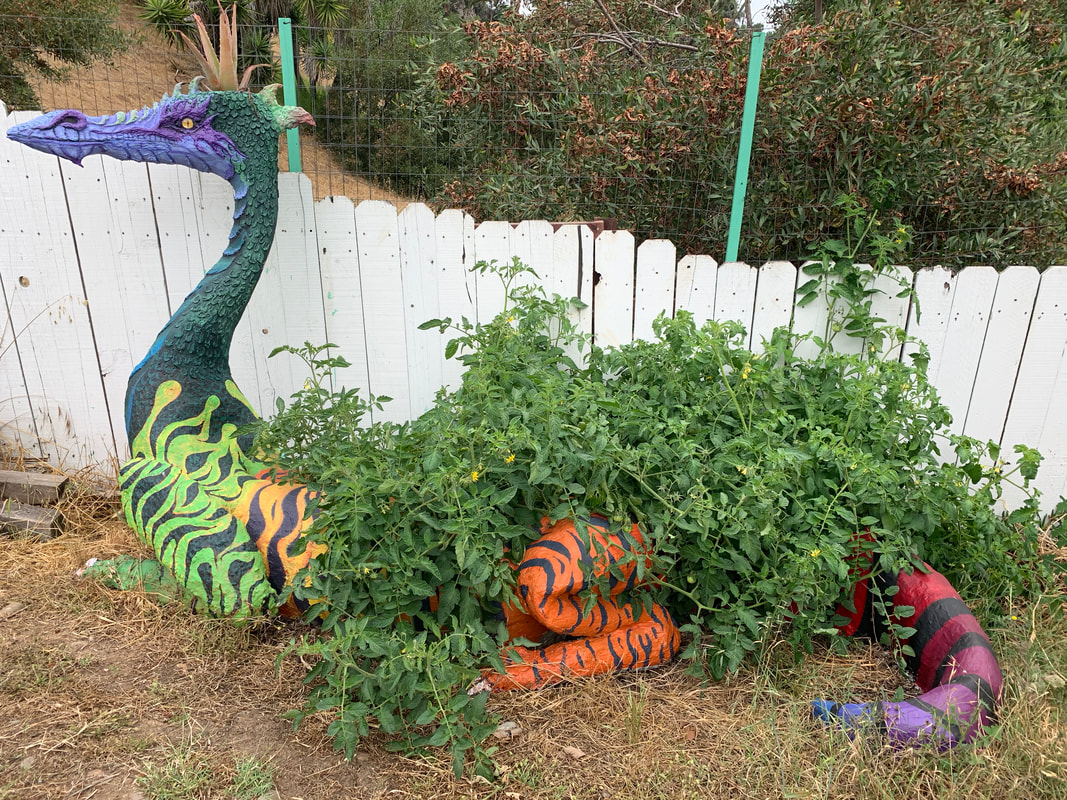
Finally, I get to paint the head. I've been looking forward to this. I spent the whole day on it.
I spent a couple more days painting the body. I knew that I wanted some tiger stripes, so I started with that, but I had to merge the orange into the green neck, so that gave me the yellow in between. Once I saw that, it became obvious that I'd continue it into a rainbow. The tiger stripes towards the tail reminded me of an Iguana's tail stripes, so I went with that.
So now, I am at a state of "doneness". I will take a break to work on other projects. I expect to return to the dragon's body later and continually evolve the painting.
The tomato plants are growing great!
The tomato plants are growing great!

A month or so later, and the tomatoes have overgrown. I need to provide them with some sort of support!
I've decided to try to build a dragon wing trellis for the vines to grow on.

|
I need a piece of wood shaped as an arc. I could use a curved branch, or maybe glue and cut & sand wood into the shape, but I'm interested to try and bend wood. I don't know how, so it'll be fun experimenting. |

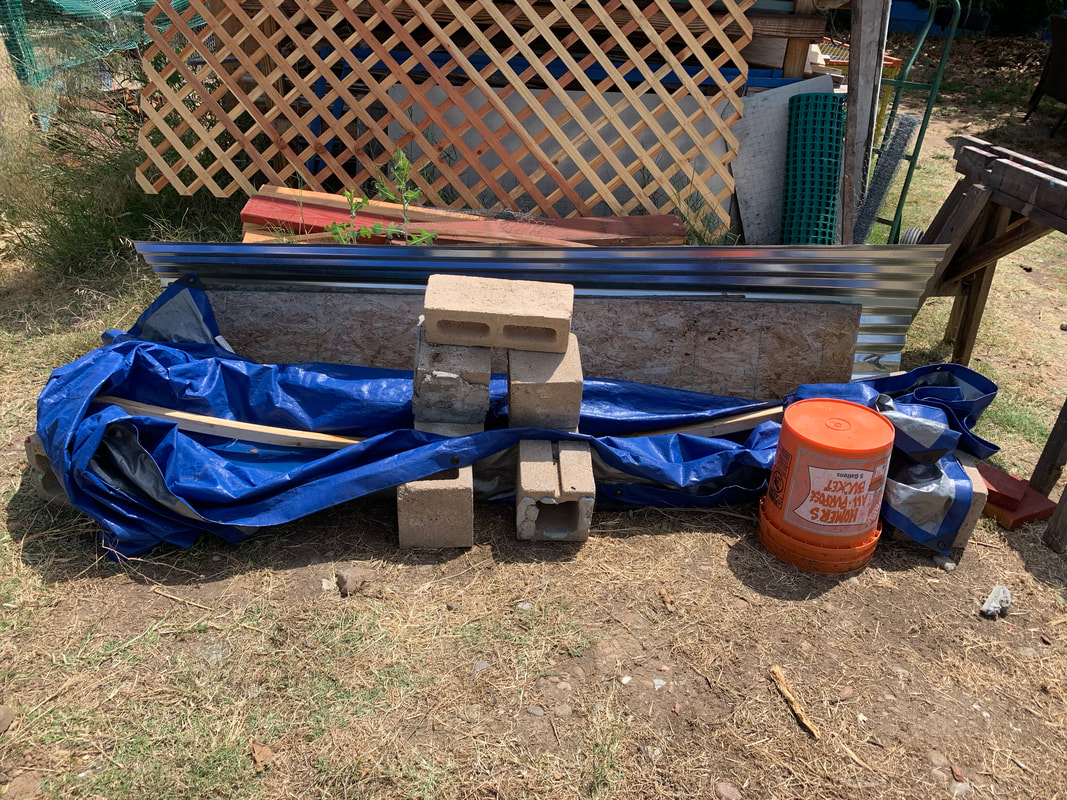
I got a 8 foot 2" x 2". I'm going to try submerging it in water, and then putting weights on the wet wood. I will save my data here.
|
I made a water vat out of a tarp and submerged the wood overnight. In the morning I put weights on it all day until it was dry. It bent a bit, but I need more curve.
|
|
|
|
So, I put it back into the bath overnight. The next morning, I pulled it out and set it up to bend with lots of weight. I guess I went too far, too fast, because it broke. I notice that it broke at a knot. That must be a weak point.
I'm kinda sad. I guess I'll try again. |
I'm going to change my procedure. This time, I will do the bending while it is still submerged. I will also add weights way slower. After it bends under water, I will flow the water out and let it dry while weighted, and then repeat the process until I have the curve that I want. I got another board, this time with no knots in crucial areas, and it is already slightly bent.


A perfect wooden wing trellis for my overgrown tomatoes!


Here she is the following year, ready for another crop of tomatoes!
A small opossum has taken up residence in the hollow tail! What a fantastic surprise!