The Wishing Machine (Formerly known as The Butterfly Garden Labyrinth)
This is a circular labyrinth made of raised garden boxes filled with milkweed, 50 feet in diameter, with a wishing well in the center that I'm currently building at Chollas Lake.
I've been planning this project for a couple years now. I finally arranged a meeting with the government admin in charge of Chollas Lake on 5/11/23 at 5pm. They were excited to accept the project!
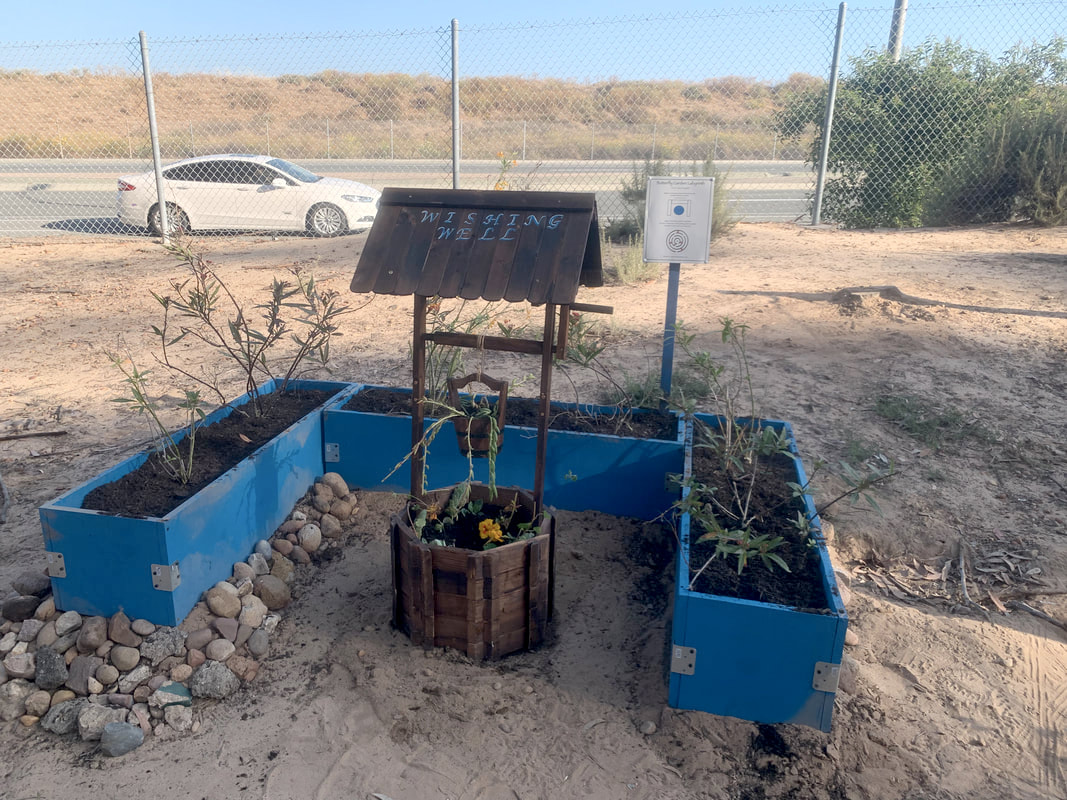
I will start with a 3 box prototype in a "U" shape that will wrap around the wishing well. I'll install this and run it through the summer of 2023 to see if any variables need adjusting before building the much larger labyrinth.
Here is my proposal:
I will start with a 3 box prototype in a "U" shape that will wrap around the wishing well. I'll install this and run it through the summer of 2023 to see if any variables need adjusting before building the much larger labyrinth.
Here is my proposal:
| butterfly_garden_labyrinth.pdf | |
| File Size: | 379 kb |
| File Type: | |

The black lines of this maze will be raised planter boxes. Each will be about one foot wide, and two feet tall. The path between the boxes will be four feet wide, so that a wheel chair could pass through. The diameter of the entire maze will be about fifty feet.
Each planter box will be filled with soil and
milkweed. Milkweed is a favorite nectar and
host plant of the Monarch Butterfly.
The wood used to build the raised boxes, will
be painted with imagery by kids from the Chollas Summer Camp & my high school visual art classes at Patrick Henry High School.
At each ‘dead end’ will be a tree stump with a ceramic “prompt” attached. Each prompt will suggest some sort of introspection, like “Remember someone you miss.” Or “What is the best thing you’ve ever experienced?”
The center of the labyrinth will host a small wishing well. While it will only be a facsimile of an actual well, it will look real with a slated wood wall, and a small hanging bucket. The words “Wishing Well” will be burned into the top wood of the well structure. It will be 3’ in diameter, and only 2’ deep with mirror in the bottom.
This piece is designed for Chollas Lake and meant to be kept for several years. Ideally, it would be placed in a location with high foot traffic and pressurized water. If pressurized water is not available, I will use a drip system. I would install this over the winter of 2023. I would fund and maintain the labyrinth throughout its duration, and I will de-install the piece entirely at its conclusion.

Trial Period
In order to troubleshoot any problems with this large public project, I would run a small test project for about a year. This would be installed in the same location planned for the final project. I’d install this in Spring (May or June) of 2023 and maintain it through the year. This small experimental project would inform any necessary adjustments for the larger installation.
In order to troubleshoot any problems with this large public project, I would run a small test project for about a year. This would be installed in the same location planned for the final project. I’d install this in Spring (May or June) of 2023 and maintain it through the year. This small experimental project would inform any necessary adjustments for the larger installation.
I fabricated the prototype planter boxes in my backyard. This included, cutting the lumber, sealing all sides with paint, bolting it together, plus cutting & staple gunning chicken wire to the bottom for gopher control. I bought a cute kit for a well and painted "Wishing Well" on it with exterior paint. I leveled the dirt area, assembled all the soil and chose six large milkweed plants from my extensive backyard collection. On June 4th, my good friend Ken Lorig and I installed the prototype at Chollas Lake!
I'm very happy with how it came out!
Next, I tried to make a decent drip device to water over extended periods.
I used a flexible caulking, but it was still a disaster. I'll have to try again differently.
In the man time, I will continue watering each box by hand using a bucket...difficult.
In the man time, I will continue watering each box by hand using a bucket...difficult.
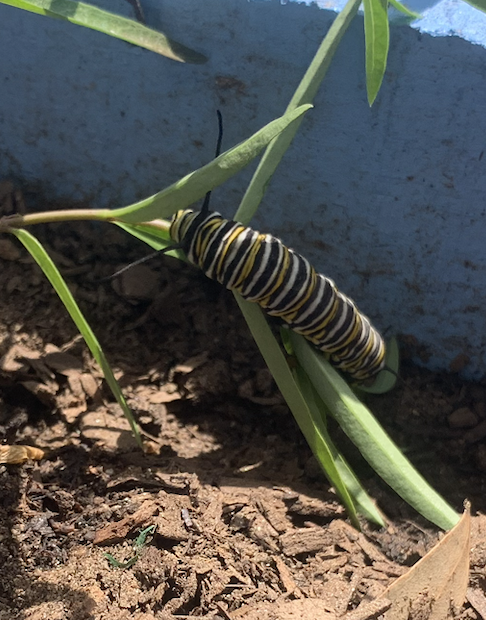
Here I am, just a few weeks in and already have LOTS of Monarch caterpillars!
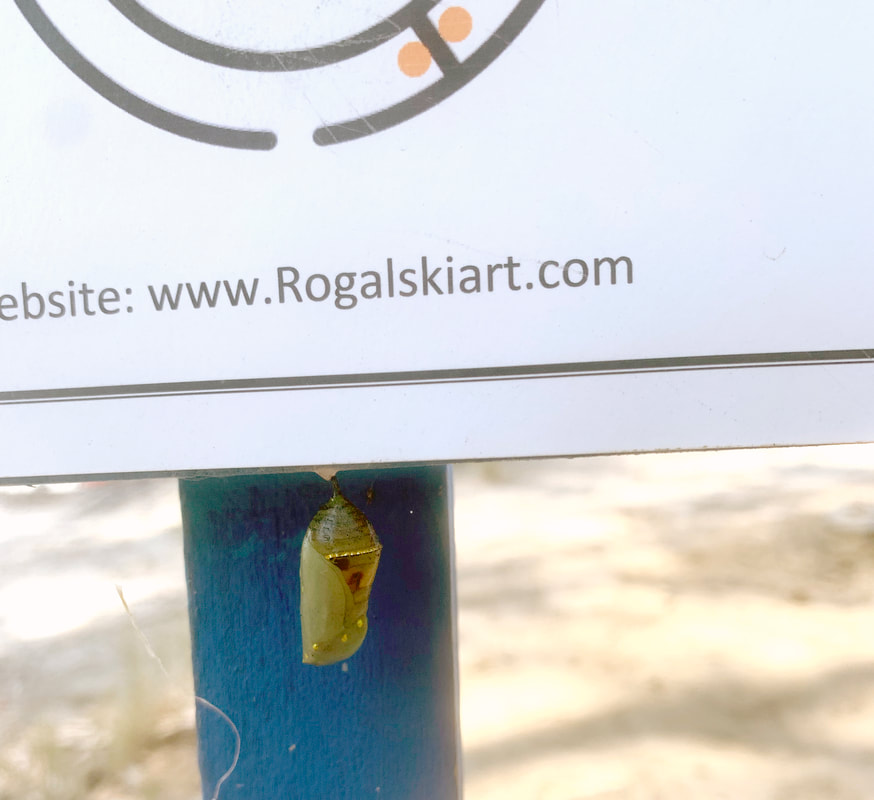
One even spun its cocoon on my sign!
I came to water today and saw that a Mom was explaining to her daughter about the life cycle of the caterpillars and that this garden was grown for them to eat...however, this was all in Spanish. Fortunately, I speak a decent amount of Spanish. I'm realizing now that I need my Wishing Well sign to also be in Spanish. Maybe all my signs should be in Spanish and possibly even Chinese.
I also saw that the cocoon has progressed!
I also saw that the cocoon has progressed!
|
Today, I took my bucket to water and found that Mourning Cloak Caterpillars have come to the passion fruit vine that I planted in the Wishing Well! |
The hardest part of this project is watering by hand every few days using buckets that I dip into the lake.!
|

In San Francisco, around 1998 or 99, I created an interactive installation called, "The Wishing Machine" The wish machine boasted a computer keyboard on which people were invited to type in their wish.
I think this new one is much better...I will change the name of this piece now to The Wishing Machine.
Today I visited the garden to water, but found that the caterpillars had eaten every single leaf!
|
|
This is a sad sight...I need to give it some energy. |
|
The good news is that I see lots of new cocoons under the roof of the well and all around! |
|
|
|
I created a sign in spanish, and installed it.
|
Next, I planted a whole new bunch of butterfly plants!
I also amended the soil, Plus the old ones are growing new leaves and I planted about a hundred seeds. Feelin GOOD!!!
I also amended the soil, Plus the old ones are growing new leaves and I planted about a hundred seeds. Feelin GOOD!!!
|
Today a family of my art students arrived. I provided supplies. They painted the lifecycle of the Mourning Cloak Butterfly on a garden box!
|
|

Over the last couple days, I have been working out my rough estimated budget to blow this up into the full project. It looks like about $5000, not counting a bobcat tractor to level the area, and any fee that a plumber might charge to set-up the watering system.
My next steps will be to speak with the Lake Rangers to check if any of these materials and services are maybe available through them.
Then, I will start looking for a grant to cover the rest...
My next steps will be to speak with the Lake Rangers to check if any of these materials and services are maybe available through them.
Then, I will start looking for a grant to cover the rest...
Alright, I have had a series of meetings and it looks like I may have a chance to get some funding from the Chollas Lake Council.
However, I have also learned that I will not have access to pressurized water. This means that I will need to buy a set of cisterns, install drip hoses, and arrange for weekly water delivery. This will cost a bit more money.
However, I have also learned that I will not have access to pressurized water. This means that I will need to buy a set of cisterns, install drip hoses, and arrange for weekly water delivery. This will cost a bit more money.

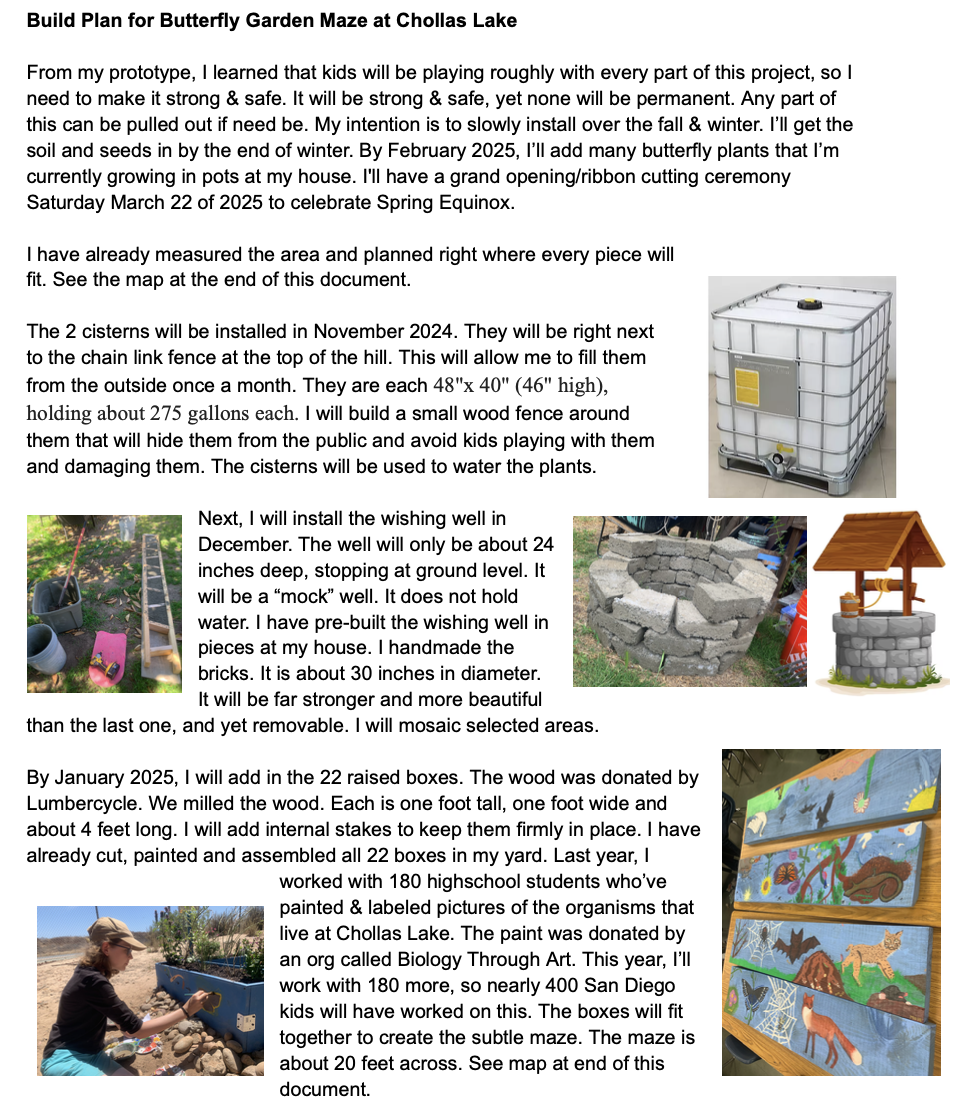
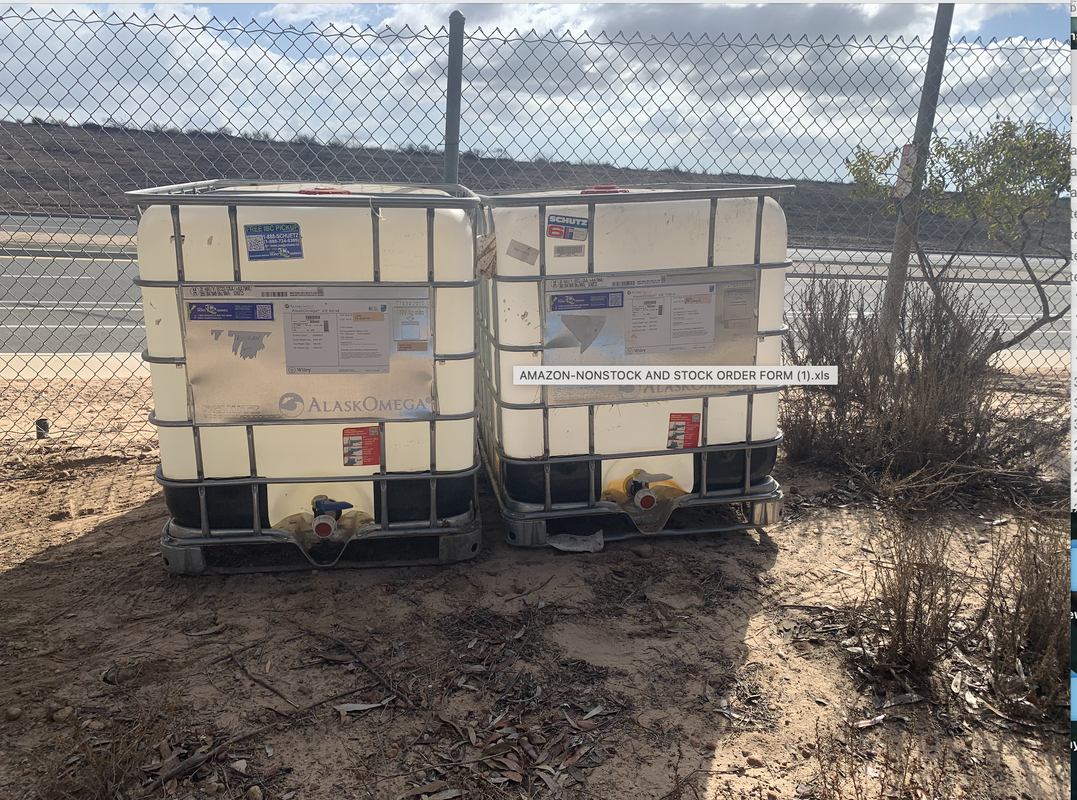
I found these guys online. They sell for $50 each and hold around 250 gallons each. I see them used all over Mexico, so I believe they work well. I can get 4 and place them around the top of the slope with drip lines running down to the flower boxes. I'll need to figure out a way to fill them on a weekly basis.
On a happier note, my friend Chris Schaie has introduced me to an amazing org called Lumbercycle, ran by Tom Hamilton. These guys ROCK! They cut down hazardous trees for free, and then mill the wood for various projects. Chris took me out to meet them, and they will mill the wood for me for one thousand dollars. This will save me lots of money AND be good for the environment, as these were hazardous trees.
https://lumbercycle.org/
https://lumbercycle.org/
|
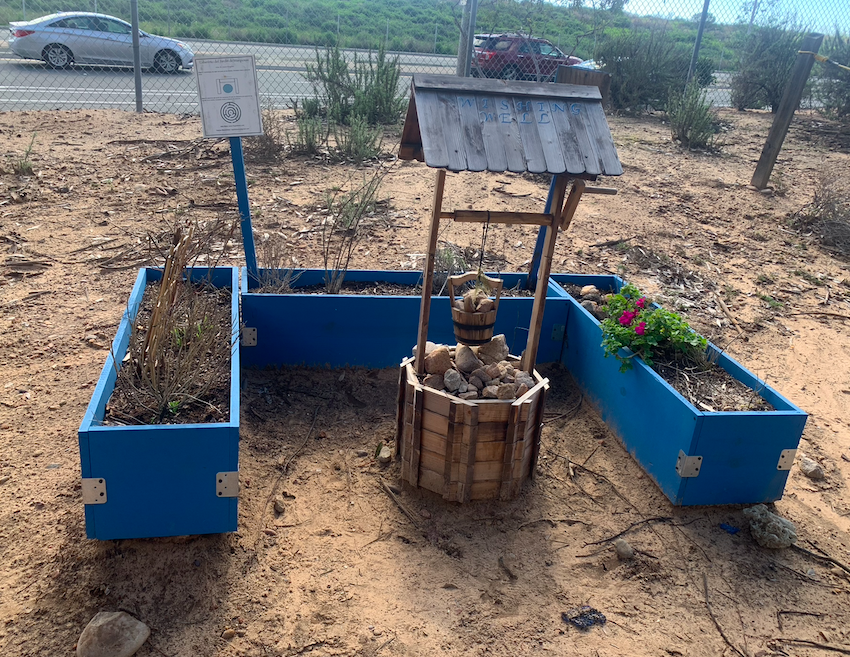
Today, I visited the Chollas Lake prototype. We've had a series of huge storms, so I expected it would be time for some upgrading. I found that the storms had torn off a sign, and washed away some soil. Also, children from the park had moved rocks from the base and filled the wishing well. Being winter, several plants were dead, but some have roots and will pop back up in spring.
|
I've learned a lot from this prototype. Recent lessons include:
* Kids will play with anything that they can.
* I must flatten the entire area, not just level the boxes.
* Several butterfly plants will die back in the winter, leaving sad looking brown areas.
* Kids will play with anything that they can.
* I must flatten the entire area, not just level the boxes.
* Several butterfly plants will die back in the winter, leaving sad looking brown areas.
|
I'm not entirely sure if it was kids uprooting & digging, or my inconsistent hand watering, followed by winter rain floods, or just the lifecycle of the plant, but there's a lot of dead area right now.
|
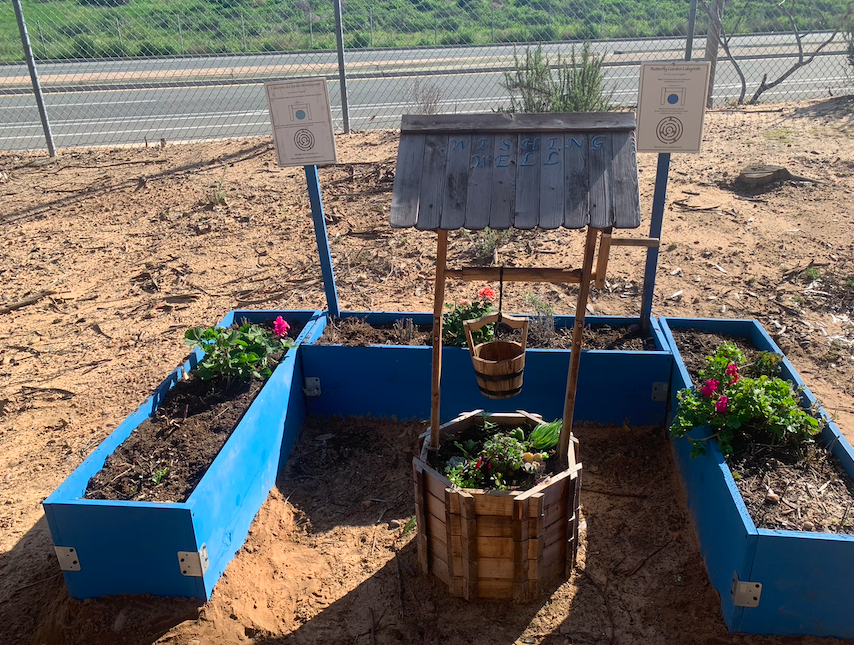
I've found that geraniums grow great & flower in the winter, so they make a nice winter place holder. I also trimmed the dead areas down low, but left the roots to come back in Spring.
|
With these new lessons, I've gained a reignited sense of excitement. I will trim the 2nd phase maze down into a next level prototype of 6-9 boxes and experiment over the next year with drip systems. If this goes well, I'll be able to expand again next year to 3rd level of size.
|
Something AMAZING has happened!
I met with councilman Raul Campillo. He says that he will support this project!!! He has delegated staff to resolve the pressurized water issue and facilitate whatever needs to happen for this to be installed! I am over the moon! The new deadline is Spring Equinox of 2025!
I will continue working on each step of this project through the year. This Saturday, I worked with The Biology Thru Art project ran by Dr. Maxwell. They received a National Science Foundation grant to explore ways to better teach college biology courses using art: https://qubeshub.org/community/groups/bioart/ This Saturday 3/9/24, we ran an outreach project in which we all met at the lake and painted organisms that live in and around Chollas Lake. We painted them onto the sides of the raised boxes. Here are some photos of our wonderful morning! |
|
|
After the workshop, I met up with the new lake intern Whitney Haluza. She is experienced in pollinator garden through her work at UCSD and wants to help our project and we are excited to have her help! She shared this excellent list of native butterfly plants:
|
| ||||||
I got to meet the amazing Emma Palmer from Councilman Campillo’s staff. We toured Chollas Lake brainstorming and trouble shooting. I walked away from this meeting feeling strongly supported and certain that this project will be installed by Spring of next year. One of her suggestions was that I find a non-profit to sponsor the project. That will be my next step.
Kind of sad...I've reached out to multiple non-profits asking for sponsorship, but have gotten no responses. Plus, I've learned that to get pressurized water may take upto 4 years, and worse "hundreds of thousands of dollars". I'm not willing to spend that kind of tax money on this project even if I could get it. My final choice is to look for a private venue somewhere else that might embrace the project...but I really want it at Chollas Lake.
So, I will try it at the lake!
I will scale it down a bit and try it with drip lines fueled by a set of 3 cisterns that I will refill by hand every few week (or so). I think I can make a good project like this. I'm feeling better about it now.
So, I will try it at the lake!
I will scale it down a bit and try it with drip lines fueled by a set of 3 cisterns that I will refill by hand every few week (or so). I think I can make a good project like this. I'm feeling better about it now.

The new design will be like this:
It will host 22 1' x 4' boxes, and the wishing well will be about 30 inches in diameter. The entire maze will be about 20 feet across.
It will host 22 1' x 4' boxes, and the wishing well will be about 30 inches in diameter. The entire maze will be about 20 feet across.
I learned from the prototype that the Wishing Well is a huge attraction to children, but they are rough with it and break it. So I will build it MUCH stronger. I will make it from bricks. However, bricks are $5 each. It'd cost me around $400 dollars to build...so I built a wood mold and have been making my own concrete bricks for about 50 cents each.
|
With these homemade bricks, I will create a beautiful wishing well that looks old & authentic & magic. It will be strong enough to stand-up to the rough kids' interaction, yet easily removable. |
|
|
Lumbercycle provided me with perfect wood! I cut it to the correct dimensions, and primed it sky blue with exterior paints provided by Biology Through Art. Then around 170 students from Patrick Henry collaborated to research and illustrate the Chollas Lake ecosystem onto the wood! These will be the raised garden boxes that make the maze.
|
|
My next step is to research how to effectively set-up a drip system from the cisterns that I will install. I have no real experience with this, so I need to speak with an expert.
I met with Sam Tall who runs City Farmers Nursery. He gave me excellent ideas for how to install my watering system! https://www.cityfarmersnursery.com/
I visited my prototype and the wishing well has vanished! I can only assume that someone stole it. Bummer, but the next one will be theft proof.
There is a new ranger in charge of Chollas now. His name is Lyon Najja. He asked that I write up my build plan and share it with him. So, I did, here it is:
Ranger Najja approved this plan and asked that I re-propose it to the CRG (Community Recreation Group) as there have been a down sizing and a few other changes. I had already met with this board a year ago, so I knew how to sign-up. I waited a couple weeks and they approved the updated plan. They explained that I needed the final approval of the new top ranger (Carey Goldstein), who used to be in charge of Chollas, but had since been promoted. So I sent it into him and he also approved it. I'm finally ready to install!!!!

My son & I drove up to Escondito and bought the 3 cisterns for $85 each. It felt CRAZY to drive down the freeway 45 minutes with such a giant load!
|
|
I've spent a nice piece of this 3-day weekend working on the cistern fence. It got surprisingly warm, and I ran out of water...walked to the water fountain, and it was not working. Bummer. After I finished, I bought a large cold gaterade and just drained that thing. I'm satisfied with the results of this step. Later, I will add small doors on hinges to access the facets, but this is perfect for now. 11/10/24
|
Next step: The Wishing Well. I can't wait!!!
My son and I de-installed (took out) the prototype of 3 raised boxes & the soil...leaving me with a blank canvas.

I've decided that I want the wishing well to look like it sort of 'GREW' from this location. I'd love it if a person could not tell where the well starts and ends into the surrounding earth.
To accomplish this, I'll add local dirt to the exterior of the bricks and I'll use dead trees as the lumber to build the little roof part. I'll pick fat branches that are not straight.
Maybe, something like this...
To accomplish this, I'll add local dirt to the exterior of the bricks and I'll use dead trees as the lumber to build the little roof part. I'll pick fat branches that are not straight.
Maybe, something like this...
|
A week has passed as I did Thanksgiving. Today, I laid out the ground plan by drawing in the dirt and insetting rocks and sticks. Of course, the well is in the center. Next, I leveled the area where the wishing well will sit. |
|
|
|
I need to make some of the bricks the color of the lake dirt, so it looks like it grew. So, I brought home a bucket of dirt to experiment with. I took an old chunk of cement, painted wet thin-set onto it, then dipped it into the lake dirt. Once it was well coated, I patted it in and did it again. I waited overnight for it to dry and washed it...not bad.
|
|
I need to create 2 legs for the well roof. I scouted the lake and found multiple tree limbs laying around (already on the ground). I picked 2 that seem perfect and cut them with a hand saw, then dragged them back to my truck. I tied them onto my lumber rack, hauled them home and peeled the bark. I cut them to 84 inches (so a third will be buried in cement). But I want to really highlight the natural beauty of the limbs. I left the little chunkers on to keep a natural look, and i sanded them just enough. I bought a high quality lacquer that I will apply tomorrow. That'll show off the beauty and keep out termites.
|
|
|
|
Today Saturday 12/7/24, I drove to the lake, dug two holes about 2 feet deep, and cemented the poles in. It was a lot of sweaty work, but I'm super excited to be creating the Wishing Well!
|
|
Today, after work, I shot down to the lake with a truckload of bricks. I laid out 3 layers and cemented them in...feelin goood!!!
|
|
|
|
Today, I finished up laying the bricks!
|
|
I was so excited that I decided to start building the roof structure. I'm not the best carpenter, and making the triangles involved lots of angles that I had to cut with a circular saw...it worked out.
|
|
|
|
I have two weeks off for Winter Break. After indulging in a week surfing & painting in Baja Mexico, I returned to San Diego and added a layer of cement to the bottom rung of bricks. I am trying to make it look like it grew from this earth and you can not tell where it starts or ends into the soil. I applied the cement at an incline, like a tree truck that splays out as the roots connect into the dirt. While the cement was wet, I embedded the surface with multiple small stones from the area and finally padded in dirt from the area. I let this dry overnight...I'm pretty happy with the result!
|
|
Today, I worked on the structure that will hold the little roof. There are a lot of angles and I'm not the most skilled at carpentry...plus I'm building it onto curvy branches, so I'm a bit nervous. I need to make it super strong and esthetically pleasing. I added little extenders to make it even stronger. I'm doing the whole undercarriage in sky blue to seal it from temites and because the whole underneath will be a surprise painting for anyone who bothers to look. I always do this on the edges of my paintings. It's even funner to add hidden surprises into an installation!
Next step-build the actual roof! |
|
|
|
For me, this is a very exciting part of the project! The roof is like the frosting on the cake. This is one more opportunity to create magic!
I will stain the 6 wood slats a dark reddish brown, then paint the words "Wishing Well" in the 6 most prominent languages of City Heights. Currently, that is English, Spanish, Vietnamese, Cambodian, Somali & Laotian. I'll paint them in using beautiful fonts, and as luck would have it; 6 slats of wood will equate to the 6 colors of the rainbow. I started by buying cheap wood posts(cedar I think) and then cutting them to fit. |
|
I painted the bottoms of the wood slats first, I'm calling this: The Secret Sky.
As I painted the clouds, I felt a lure to hide animals in the clouds. Fortunately, I'm disciplined enough to rebuke such childish temptations. |
|
I'm realizing that there are art pieces WITHIN this artwork. Not only mine, but others. An artwork made of multiple artworks...interesting.
|
|
I used every spare moment this week to finish up the lettering on the roof slats. I'm pretty happy with them! |
|
A fat north swell is coming, so I'm shooting down to Baja this weekend. However, I REALLY wanted to get the roof attached before I headed south, so I DID! After school, still dressed up in my teacher costume, I bolted on all the slats. My son Sage took some photos. |
|
|
|
I spent the morning painting clouds onto the structure inside the roof. It was super windy and I could see lots of moving clouds to work from. What a nice morning! |
|
Today, I realized that the dirt floor of the well was bothering me. It makes it feel fake because it isn't deep. Of course, I can't actually make it deep. However, I can go slightly deeper than the ground level and make an illusion of depth. I did this by digging about a foot deep and insetting small black plant pot. I cut the bottom out of a larger plant pot and put it on top, so it appears to be going down into the dark depths...when in fact it is only 12 inches deep.
|
|
|
|
I sprinkled coins into the bottom pot, and poured resin over the coins. This will hold them in place and look like water!
|
Next step...is to build the MAZE!!!
|
Today, I laid out the maze. Sooo much fun! I realize that a couple of estimations were slightly off, so I had to add 3 boxes. That brings me up to 25 boxes. |
|
|
|
I woke up at 5 AM in the dark. I was wide awake, and very excited to get another step done, so I just went ahead and got started. I got all my tools together, and started assembling the boxes. After constructing 4 boxes, I realized that I was very short on the end pieces. So, I popped home and chopped all the prototype boxes up into ends. I had to paint parts and then wait for them to dry. After lunch, I was ready to go again. There is hardly anyone around. Apparently, today is Superbowl Sunday. I worked until 5pm and am stoked on the progress!
|
Two un-anticipated challenges that happened today, were #1 The square around the wishing well is a bit too small. The corner of the roof would likely hit someone. So, I had to spread the boxes a bit more than I originally planned. #2 was that when I butted the boxes up together at any curve, one box covers about a foot of imagery. Good news is that when I move boxes apart, that exposes the hidden imagery.
|
I took a few days to surf in Mexico and came back with GUSTO! I woke up at 5am. I couldn't wait to get started. I worked all day assembling boxes. So many people said nice things about it! Sometimes the conversation comes in Spanish too. At one point, two women seemed to be having difficulty communicating, so I spoke Spanish, but that didn't work either. Eventually, I realized they were both deaf. I knew some sign 30 years ago, but I'm rusty these days. We were still able to have a pleasant interaction using crude hand movements. At a different point, two Mexican women began calling for me to help from the playground. Their adorable 3 year old had gotten her tiny finger trapped in the chain of the swing. She was screaming. It took a long minute, but we got her out. |
|
|
|
When I had just 5 boxes left to assemble, I was pretty overheated, sweating, tired...all that. I ripped my finger open pretty good. The blood wouldn't stop, so I took a break in the shade and applied direct pressure as I sipped my ironically red Gatorade. I did rub a little blood into the wood. That's always the mark of a good piece. I finished up the last boxes as so many people shared nice comments & conversation. |
My next step is to build in the drip system. This makes me VERY nervous. It is vital to success and I have zero idea how to do it. I need to find some help. Out of desperation, I put a post on a huge FaceBook page that I help moderate called The San Diego Backyard Gardeners page, it has over 16K people. I explained my situation, and to my surprise, multiple people offered seeds, plants, fertilizer, soil, physical help, and aid in planning the drip lines! A man who wishes not to be named stepped up. I met with him today. He is expert level at setting-up non-pressurized watering systems and I feel certain that he will bridge this gap.
City Farmers Nursery will donate the soil!!!
We will be planting seeds & butterfly plants all week after that. You can show up on your own, but I'll be there after 3pm (except wed & thursday).
I'm already planning the Opening Reception for March 22nd SPRING EQUINOX! ...at noon!
We will be planting seeds & butterfly plants all week after that. You can show up on your own, but I'll be there after 3pm (except wed & thursday).
I'm already planning the Opening Reception for March 22nd SPRING EQUINOX! ...at noon!
|
We will finished the trenching, pipes and drip lines! |
|
|
|
I built a lock box to hide the main water shut offs from kids. (young kids like to turn knobs) I must admit that I'm pretty proud of my carpentry skills here...maybe I'm getting better! |
|
I brought a trashcan full of water and syphoned into the cisterns. I did this 3 times. It took a long time. Maybe I'll buy a pump for the future.
I sure wish that I could find a service to just fill them for me! |
|
|
|
For 2 days, I've worked with volunteers to add top soil into the boxes. The soil was donated by City Farmers Nursery. Mike Maxwell, from Biology Through Art helped along with a biology student named Natalie & a scientist named Lisa from The Backyard Gardners group. Thank you everybody!
|
|
Several of us have started planting butterfly flower seeds & plants! Mike planted white sage, Lisa planted baby milkweeds, Natalie planted purple daisys and a ton of wildflower seeds, and I planted a couple mature milkweeds. We need about 100 more flowers! Please bring flowers and plant them in any box YOU like.
|
I'm planning the Ribbon Cutting Event for March 22nd from Noon to 2pm!!!
Got a lagit permit and have invited multiple groups. This should be a FANTASTIC gathering!
Got a lagit permit and have invited multiple groups. This should be a FANTASTIC gathering!
|
|
Today, after work, I built half the fence. It's kinda funky, but nice. |
|
I also posted a series of signs asking kids to respect the garden...
|
|
This Thursday, I'll be working most of the day to finish things up!
Saturday is the Ribbon Cutting! It'll be a Sharing...sort of like a potluck, but also inviting anything to share, not just food. I expect lots of live music...
Saturday is the Ribbon Cutting! It'll be a Sharing...sort of like a potluck, but also inviting anything to share, not just food. I expect lots of live music...
Now, that the actual project is built...my new priority is setting up a fantastic opening event!
I'd love to have some legit Soundart. Soundart is not necessarily music....its its own thing (and i love it).
I need to advertise the event...do a press release and buy an event permit.
I'll do a performance art piece and i need some community building activities... I'm thinking to set up a plant trade area, and a food/drink sharing area, and a piñata, and a planting station where people can actually plant baby plants into the garden.
Of course, this will all happen on Spring Equinox to celebrate the beginning of Spring!
I paid about $200 for an event permit to have my event.
|
I reached out to a few friends and 2 artists will play! Everyone will play for free. Eric Lende will write songs just for this event :D MJ Stevens is an OG sound artist in San Diego. I'm so honored that he will share with us. He is setting up a project to invite kids...I think he called it the Butterfly Orchestra. |
|

I put out a few press releases. I'm not great at this...I did my best.
https://www.kpbs.org/events/2025/03/22/ribbon-cutting-ceremony-for-the-wishing-machine
I got it on a few venues...and it did spread from there :D
Thank you KPBS!!!
You are AWESOME!!!!
https://www.kpbs.org/events/2025/03/22/ribbon-cutting-ceremony-for-the-wishing-machine
I got it on a few venues...and it did spread from there :D
Thank you KPBS!!!
You are AWESOME!!!!
|
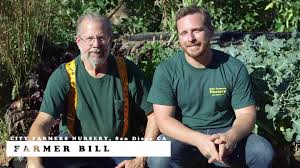
Also, City Farmers Nursery donated ALL the top soil for this project. I worked with Bill for years, and his son Sam Tall is just as real. Nothing but Respect. They also posted on their page and it did spread from there...so wonderful.
|
I bought a ton of yummy food, juice and baby flowers for people to plant, supplies for my performance and a garden piñata with a rope & candy....all the things. I think I'm READY.
Of course, I woke up at 5am....
Can't stop thinking about what needs to happen.
Can't stop thinking about what needs to happen.
|
I brought multiple folding tables. I made signs and posted them. I bought bags of ice for my coolers. 5 kinds of soda & juice. potato salad, pasta salad, cookies, chips, shovels and 100 baby plants. Smiles & LOVE. What can go wrong? |
|
|
|
The morning of the event, people began to arrive. Some knew about it and others happened on it randomly. Many were asking how they could help.
We set up tables, posted signs and welcomed anyone as part of our group. |
|
About this time, I started my performance art piece. For Spring Equinox I wore a white suit with multiple pockets. I filled all my pockets with live Lady Bugs. I also dyed my hair bright green and spiked it...because lady bugs climb and fly... I had 6000 lady bugs, so I refilled my pockets multiple times throughout the event and was constantly covered with them. |
|
|
|
MJ Stevens was jamming with anyone that came close. He had a set of experimental sound making devices. I think he merged with Eric Lende and a swarm of kids... |
|
People were flooding in! |
|

The Creepers showed up!!!!
They are a bicycle group, most of them are sound artists...real humans.
|
Other people brought flowers to plant too!
Everyone was planting flowers as the strange music played. Around 100 people flowed through over the course of the event. |
|
|
Brandie Maddalena (local artist) set-up a face painting station! |
|
|
|
People came in waves! Lots planted flowers & made wishes. |
|
|
Holiday Horton created an Augmented Reality artwork inside the maze. If you used her QR code you could see virtual reality butterflies in the garden & the whole life cycle! In fact, it will work anywhere...just point the camera of your phone at THIS QR code and follow the prompts...pretty cool! |
|
|
Holiday got these shots:
|
|
|
|
I hung up a fat piñata in the shape of a flower. Some parents sang the traditional Mexican song! The kids destroyed it. Super fun! |
|
|
Finally, with about 30 minutes left, I stretched a fancy red ribbon across the entrance to the garden maze. I got everyones attention and asked for a kid to come do the ribbon cutting. 3 adorable little girls ran up and together held the big gold scissors and cut the ribbon, then they ran squealing into the garden...PERFECT.
|
|
A month has gone by since the opening. I developed Donnas watering station. Kids LOVE it! They are watering the flowers for me :) Also, people have added decorations and even raked...so cool. It feels like the community has embraced this project! I do still worry about water though. The pipes don't hit everything and if kids miss a plant, it'll die. |
|
An organization called Busy Bee Garden Co op contacted me with an offer to help.
This is their mission: A project of the Lemon Grove Garden and Nature Group. Busy Bee Garden Coop facilitates Lemon Grove neighbors to help neighbors to build pollinator gardens. Our goal is to transform Lemon Grove into a Certified Bee City!
I drove over to their site, and met the amazing Chelsea Gastelum. She donated around a dozen native butterfly plants. We had a great conversation as we walked through their magic pollinator garden.
|
|
It is the best I've ever seen and the caziest thing of all: they don't need to water it!!! Its all local plants, so they do fine on the low amount of rain that we get here in San Diego. She will help me to develop the maze in this same way. This solves my biggest problem. |

